"The Oil Sister" by Essentially Well LLC
  • Home
  • About
    • My Mission
    • Our Story
    • Our Team
    • Essential Oils >
      • Young Living Essential Oils
      • Premium Starter Kits
    • Contact Us
  • Essential Oils
    • How to Order
  • Supplies
    • Rollers
    • Bottles & Jars
    • Carrier Oils & Bases
    • Soap & Laundry
    • Skin Care & Makeup
    • Vitality Supplies
    • Diffuser Jewelry
    • Labels
    • Books
    • Etsy Stores
  • Blog
    • All Posts

6 Easy Homemade Gift Ideas Using Essential Oils

12/26/2018

2 Comments

 
diy essential oil gifts

DIY Essential Oil Gifts

No matter how hard we prepare for the holidays, it always seems like there is so much to get done. Gifting is a particularly stressful venture for most of us. In this era there are so many different options for gifting, but so few of them are original. Further, few of them are actually products that I feel comfortable using.

​This is where I value to concept of DIY gifts. You know exactly what ingredients you are "giving" in your gift. What could be better around the holidays or special events than a promotion of natural health. After all, switching to natural products and essential oils changed our lives!
Easy Homemade Gifts

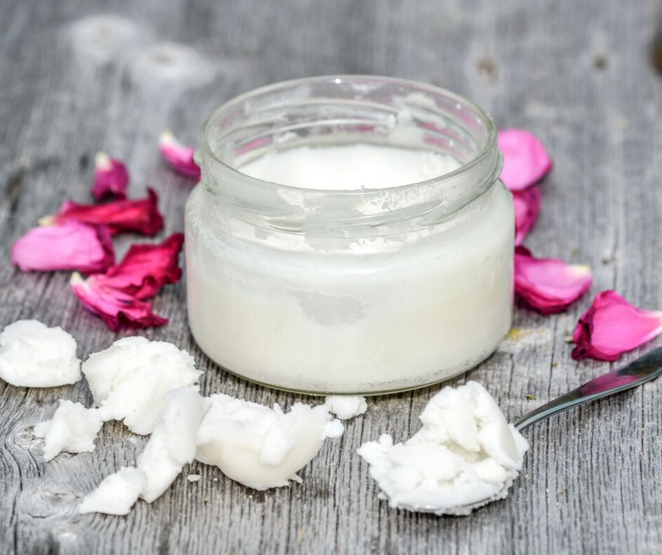
​A World of Information... and Misinformation

Before we get to the recipes, allow me to discuss an important concept regarding transparency and availability of information. In the modern era information is so very accessible. Some good. Some bad. Some in between. It is very difficult to discover the difference between truth and malicious propaganda.

​I am by no means a conspiracy theorist and I do not mean to sound that way. The difficulty is that most large companies are primarily interested in generating a revenue stream. When they hear health, they think money. That is just the way most organizations are able to grow. Who could blame them? Well, perhaps there are reasons not to be so empathetic to these corporate giants. 


Companies are able to list fragrance as a generalized umbrella term, instead of being required to list each chemical individually on their labeling. Some of the most common villains hiding in everyday products are: formaldehyde, synthetics, dyes, phthalates, fragrance, parabens, aminophenol, diaminobenzene, phenylenediamine, and petrochemicals. This is not good stuff people! Please do not keep using these store-bought products on or in your body! 

For these seeking further information on a particular product such as a household cleaner, please utilize the EWG website to search some of the items in your home. Be prepared for what you might discover. For those of you who have a regular cosmetic product that you like to use, please search for it here! You might quickly learn (as did I originally) that several of your go-to products are laden with potential health risks.

There is when I became motivated to share information with others on my transition to a more natural lifestyle. Initially, it was scary to learn about the products I used regularly and the list full of ingredients that might be linked cancer, organ toxicity, respiratory dysfunction, and disruption of the endocrine system. Knowing this, I am happy to share any DIY recipes that I can to avoid this list of potential adverse effects. 


To put things further into perspective consider this: an average woman using traditional products may apply over 300 chemicals before they even leave for work. I used to be one of them! I have become very good at reading labels, and I urge you to start as well. Honestly, the EWG site is one of my go-to resources for learning about each product's list of ingredients. Please gradually increase your awareness to what ingredients you are introducing to your body.

For complete transparency, and to further facilitate removal of harmful ingredients in my life, I purchased a premium starter kit from Young Living. 
Young Living has facilitated an environment of transparency and allows me to have confidence in their products with their Seed to Seal Promise. Further, they have been around for a long time and have millions of loyal followers! 

I was originally not the "homemade" or "do-it-yourself" type. This was true until I learned about essential oils and how they would impact my life! Now I am hooked and would love to share some great occasional or holiday DIY gift ideas. 

Here is a list of my favorite homemade gifts for the holidays or a special occasion: 
  1. Whipped Body Butter - supports and soothes dry skin
  2. Lip Balm - soothes dry lips
  3. Sugar Scrub - a gentle exfoliate to soften and support healthy-looking skin
  4. Chest Rub - homemade chest rub that every family will use for natural wellness throughout the winter
  5. Christmas Spirit Room Spray - eliminate toxic fragrance filled sprays while still enjoying natural scents of the season
  6. Essential Oil Roller - simple way to benefit from using essential oils topically for all the body woes

​

1. Whipped Body Butter
One of my favorite homemade ideas is lavender cocoa body butter. The smell is irresistible. This simple recipe has supported my irritated, dry skin. With constant handwashing (a hazard of being a schoolteacher) dry skin is seemingly always around. The ingredients nourish the skin and supports healthy integument*. It is much easier to make than you might think!
Ingredients for the body butter:
  • Young Living Essential Oils such as Lavender and Peppermint
  • Vitamin E
  • ¼ cup Shea Butter
  • ¼ cup Cocoa Butter
  • ½ cup Coconut Oil (solid)
  • ½ cup almond oil or grapeseed oil
  • Double broiler (or use a pot of water and a glass measuring cup)
  • Glass Jars- I typically use 2 ounce or 4 ounce, check out my supply page to see what I have found!
Directions:
  1. First set up your double broiler with water (some readers report using a pot of water while hanging a glass measuring cup inside)
  2. Turn the heat to low or medium
  3. Add your Shea Butter, Cocoa Butter, and Coconut Oil to melt. It’s important to stir regularly and keep off high heat, do not boil these ingredients. Allow them to melt slowly... be patient.
  4. Once melted, remove from the heat (I actually pour the ingredients into a new mixing bowl because so it's easier to whip with the mixer later)
  5. Then add about 20 drops each of Lavender essential oil, grapeseed oil, and vitamin E.
  6. Once added, place the mixing bowl in the refrigerator to solidify. Intermittently check on the mixture to ensure it is solidifying
  7. Once the ingredients solidify, your going to use a mixer to whip the ingredients. If the cream becomes too hard, just set on the counter to soften before mixing. I have found that the cream doesn’t have to be hardened completely to create a perfect body butter.
  8. Once whipped to a fluffy butter you can transfer it into glass jars by using a spoon or butter knife
  9. Once I transfer the body butter into the jars, I seal them tight and decorate (this is optional)! 


2. Essential Oil Lip Balm 
This was also a big hit this year and I can not believe how easy it is to make your own Essential Oil Lip Balm. To be honest, until this year it was a DIY product that avoided because I thought it would be very time consuming. Guess what, its' not!
Ingredients for Essential Oil Lip Balm:
  • Young Living Peppermint and Lavender Essential Oils
  • 1 Tablespoon Grape Seed Oil or Almond Oil
  • 1 Tablespoon solid Coconut Oil
  • 1 ½ Tablespoon Beeswax
  • 1 Tablespoon Shea Butter
  • 1 Tablespoon Cocoa Butter
  • Double Broiler (or use a pot of water and with a glass measuring cup)
  • Lip balm tubes orlip balm tins
Directions for Essential Oil Lip Balm:
  1. First set up your double broiler with water (some readers report using a pot of water while hanging a glass measuring cup inside)
  2. Then add the Coconut Oil, Beeswax, Shea Butter, and Cocoa Butter and melt to a liquid form. Do this slowly! Avoid high heat.
  3. Once they are melted, I add Grapeseed Oil, Peppermint, and Lavendar and stir slowly. You can remove it from heat while doing this. For this recipe, I use about 10 drops of Lavender and 10 drops of Peppermint.
  4. While in liquid form (you may have to introduce a little heat again for this), I pour into lip balm tins.
  5. I leave the cap off and let them sit to cool and solidify. Once the lip balm has harden for finishing touches, I cap and label them with decorative vinyl or stickers.


3. Sugar Scrub
I have been making sugar scrubs for a long time now. They are super easy to put together and a very effective, natural, way to support your skin! If you’re looking for an inexpensive way to give a lot of people a small gift to say thank you, this is it.

Sugar scrubs can be used on the entire body from heels to lips with various essential oils. I often add this self-care step to my shower routine and I am amazed by the results. I use the scrub on my legs, feet, elbows and upper arms to gently exfoliate pores and soften the skin. It’s a perfect product from summer through winter to hydrate.

Ingredients for Sugar Scrub:
  • Young Living Lavender and Peppermint Essential Oils
  • 1 1/1 cup organic sugar (brown or white sugar or Himalayan sea salt as an alternative)
  • ¼ cup carrier oil such as Coconut Oil, Grape seed Oil, or Almond Oil
Directions for Sugar Scrub:
  1. Combine sugar and carrier oil in a mixing bowl. You want this blend to be like wet sand consistency.
  2. Once I stir these together, I actually spoon the mixture into small glass jars and add the essential oils to the jars directly. I put about 6 drops of essential oils into 2 ounce jars.
  3. After adding essential oils, I put the cap on tightly and shake the ingredients together. There are a variety of essential oils that support skin, I typically use lavender, peppermint, cinnamon, lemon, orange, stress away, and tea tree in any combination. When gifting a sugar scrub, I often avoid using citrus oils because of potential photosensitivity (citrus oils are known to be reactive to direct UV rays from the sun). I typically use use peppermint or lavender because both are easy for all people to use safely.
  4. Once essential oils are added, cap is sealed, I label with ingredients and directions for friends and family.


4. Wellness Chest Rub
I found that many people experience the need to support their breathing during the colder months (folks of the northern climate). This is a great option for introducing people to the power of essential oils.
Ingredients for Wellness Chest Rub:
  • Young Living Essential Oils such as Raven, Peppermint, Eucalyptus, Lavender, and RC
  • ¼ cup Shea Butter
  • ½ cup solid Organic Coconut Oil
Directions for Chest Rub:
  1. First set up your double broiler with water (some readers report using a pot of water while hanging a glass measuring cup inside)
  2. Melt the Shea Butter and Organic Coconut Oil over medium heat. Do this slowly! Do not boil. Stir slowly and often as they liquefy. 
  3. Once liquid, I remove from heat and pour the blend into a mixing bowl to add the essential oils. I typically add about 20 to 30 drops of essential oils when making the chest rub for adults, please use proper dilution for a chest rub for children. Raven, Lemon, Thieves, Peppermint, Lavender, Eucalyptus, and RC, are all various essential oils that have wellness supporting properties for the respiratory and immune system.
  4. After mixing the blend, but the bowl in the refrigerator to bring back to solid form.
  5. When the cream has solidified in the refrigerator,  remove and allow softening to make using the electric mixer easier.
  6. Once softened, I use the electric hand mixer to whip the blend into a fluffy cream. I use a butter knife or spatula to transfer the chest rub into the desired glass jars. 


5. Christmas Spirit Room Spray
Room sprays are so easy to put together and require only a few ingredients. They make for an affordable gift that all people can put to good use in their home. The easiest place to use room sprays would be in the bathroom. One of the easiest ways to eliminate fragrance filled products in my home was creating DIY room sprays.  
Ingredients for Room Spray:
  • 2 oz glass spray bottle
  • 15 drops of Young Living Essential Oils
  • 1 teaspoon Thayer Witch Hazel
  • 2 oz Distilled Water
Directions for Room Spray:
  1. Drop some essential oils to the 2 oz glass spray bottle. Around the winter holidays, I like to use Christmas Spirit Essential Oil, but you could use any essential oil that you enjoy. Thieves, Lemon, Orange, Cinnamon, Purification, Citrus Fresh are all great essential oils for making room spray. I typically put anywhere from 10- 20 drops of essential oils into a 2 oz spray bottle, change the total of drops depending on how strong you are looking for your room spray.
  2. Add about 1 teaspoon or a dash of the witch hazel.
  3. Fill the rest of the spray bottle with distilled water.
  4. Put the spray top on the bottle and label with decorative sticker or vinyl.


6. Essential Oil Rollers
Rollers are a convenient way to apply essential oils topically. Essential Oils are absorbed quickly through the skin. Some essential oils are potent so it is suggested that some are diluted with carrier oil. Please exercise proper safety and caution.
Ingredients for Essential Oil Rollers:
  • Young Living Essential Oils
  • 5 ml to 10 ml of Fractionated Coconut Oil
Directions to make Essential Oil Rollers: 
  1. Take a 10 ml roller bottle and the essential oils to the bottle
  2. Fill the rest of the bottle with carrier oil
  3. Once filled, place the roller ball on top.
  • If gifting, I label and provide instructions on how to use the roller safely. I have a lot more tips and tricks for making roller bottles, to get some more ideas read my Essential Oil Roller Recipes blog.
Here are 3 of my favorite Rollers:
  • Wellness Roller - Thieves & Lemon Essential Oil + Carrier Oil
  • Stress Away Roller- Stress Away Essential Oil + Carrier Oil
  • Head Tension / Energy - Peppermint Essential Oil + Carrier Oil 


Well, there you have it. My six favorite, natural DIY recipes. I have been using these to create cute gifts for family and friends for any and all occasions. The feedback from those who have received these has been awesome!
Young Living Gifts
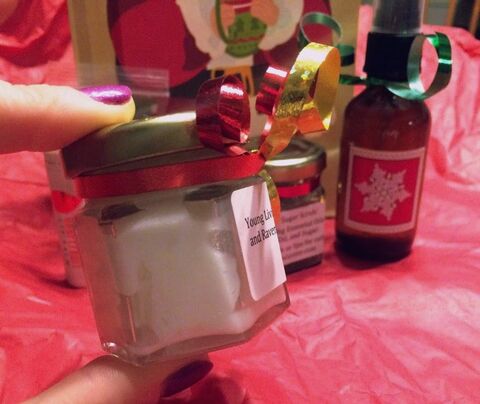
As always, if you are new to essential oils and do not have any of your own, consider a premium starter kit from Young Living. This is widely regarded as the simplest way to get started with essential oils. When signing up for your first kit, you will have the opportunity to choose one of our leaders. This is an important step as they will provide you with ongoing support for the lifetime of your Young Living journey at no added cost to you! You can do this simply by visiting the our team page and selecting the individual you would like as your direct upline.

Further, by signing up as a member you will also receive tons of additional promotions such as saving 24% off retail pricing on future purchases of Young Living products.
 
If you have not done so already, please subscribe below for the latest updates, offers, and promotions exclusive to our essential oil community!
*These statements have not been evaluated by the Food and Drug Administration. Young Living products are not intended to diagnose, cure, treat, or prevent any disease. Please see our disclaimer.
2 Comments
Cheyenne Medeiros
6/24/2019 11:10:30 pm

Hi there, for the chest rub are you using all of the suggestions or just one or two of them? For the hand soap are you mixing thieves and also lavender or just one of them? Thanks for your time, great post!!

Reply
The Oil Sister
6/29/2019 08:49:39 am

Thank you for using my blog to help make your DIY recipes. Remember, you can customize any recipe that you see here. I typically give a few essential oils so that our readers may have some options in their Young Living supply at home.

When I am making my chest rub, I like to use about 2-4 different essential oils, again depending on what my body needs. I like to use Raven, Peppermint, and Eucalyptus for a typical chest rub, but adding lavender would be soothing at night.

Lavender and Thieves would be a great combination for foaming hand soap because the Thieves will support cleansing and Lavender will support healthy skin. You could use both or keep it simple by just picking one. It's really up to you. I would not use Thieves in a foaming face soap recipe because Thieves is a powerful essential oil that could irritate sensitive skin. For face soap recipes, I use gentle essential oil such as Lavender and Frankincense. You can also check out my post https://www.oilsister.com/blog/natural-skin-care for even more skin care recipes.

Reply

Your comment will be posted after it is approved.


Leave a Reply.

    Disclosure: These posts may contain affiliate links wherein I get a commission if you decide to make a purchase through these links, at no additional cost to you. 
    Picture
    The Oil Sister

    The Oil Sister

    ​My name is Missy and ​I am the owner of Essentially Well LLC and the primary author of "The Oil Sister". Challenging myself to learn about natural health and wellness has been a life-changing experience for me. I want to share what I have learned with YOU!

    Subscribe to Our Newsletter for Updates

SUBSCRIBE TO NEWSLETTER
The Oil Sister
Essentially Well LLC © 2024. All Rights Reserved.
Privacy Policy    Terms & Conditions    Disclaimers & Disclosures
Disclaimer: All information, content and product descriptions contained within this domain are for reference purposes and are not intended to substitute advice given by a pharmacist, physician or other licensed health care professional. We do not advise you use the information contained within this website, or any other site for treating a health problem or disease or to make a self-diagnosis, without speaking with your doctor. Actual product packaging and materials may contain different information than shown on this website. Contact your health care provider immediately if you suspect that you have a medical problem. Information and statements regarding our products have not been evaluated by the FDA. We are not medical professionals and this information is not, in any way, intended to take the place of medical advice. This information located on this website is for educational purposes only and is primarily based off opinions and facts that we have found to be true in our own experience and with research we have gathered from books and online. We are not diagnosing, treating, or prescribing. If you have any health conditions, are on any medications, are being seen by a medical professional for any reason, are elderly, pregnant, nursing, have babies or young children or animals please consult your physician or veterinarian as well. Application of this material is personal choice and in no way is the author responsible for the application of these choices.
Photos from Marco Verch (CC BY 2.0), Jaykhuang, verchmarco, verchmarco, wuestenigel, Francisco Anzola, tawalker, verchmarco